Saturday, August 10, 2013

August Garden Report - Fall planting

Although the garden is still producing delicious yumminess on a daily basis, we've actually plowed under half of it already for fall planting!

The zucchini are growing as big as Popeye's arms before we even see them hiding under those big leaves, and when we think we've found every last one, my husband comes in and plunks down another brick-bat on the table. Zucchini bread. Lots and lots of zucchini bread!

We're gathering enough green beans for dinner every few nights, too, which is nice. Those suckers produce long and hard. I love it. I planted three phases of green beans, and all three are now producing. They are all supposed to be bush beans, but a couple heirlooms decided to go rogue and grow vines, so I popped some sticks in the ground to support them. I'm glad they did, because its actually taught me that I prefer harvesting green beans from vines versus crouching down searching for them under the leaves of the bush variety. They also seem to grow straighter on the vine which is nice.

Believe it or not, we've harvested our first pumpkin! This little beauty came out of the garden a couple days ago and will stay in the green house for 10 days to "cure." I've learned that pumpkins need 10-14 days in high heat with humidity to get a harder shell that will help them last longer through the winter! Although I'll be making this one into a pie soon, I wanted to test out the process for the rest of the pumpkins we'll be getting. Which will be A LOT... see next photo... We've counted about two-dozen pumpkins. Mostly large Jack-O-Lantern variety, but a few sugar pumpkins for baking, too.


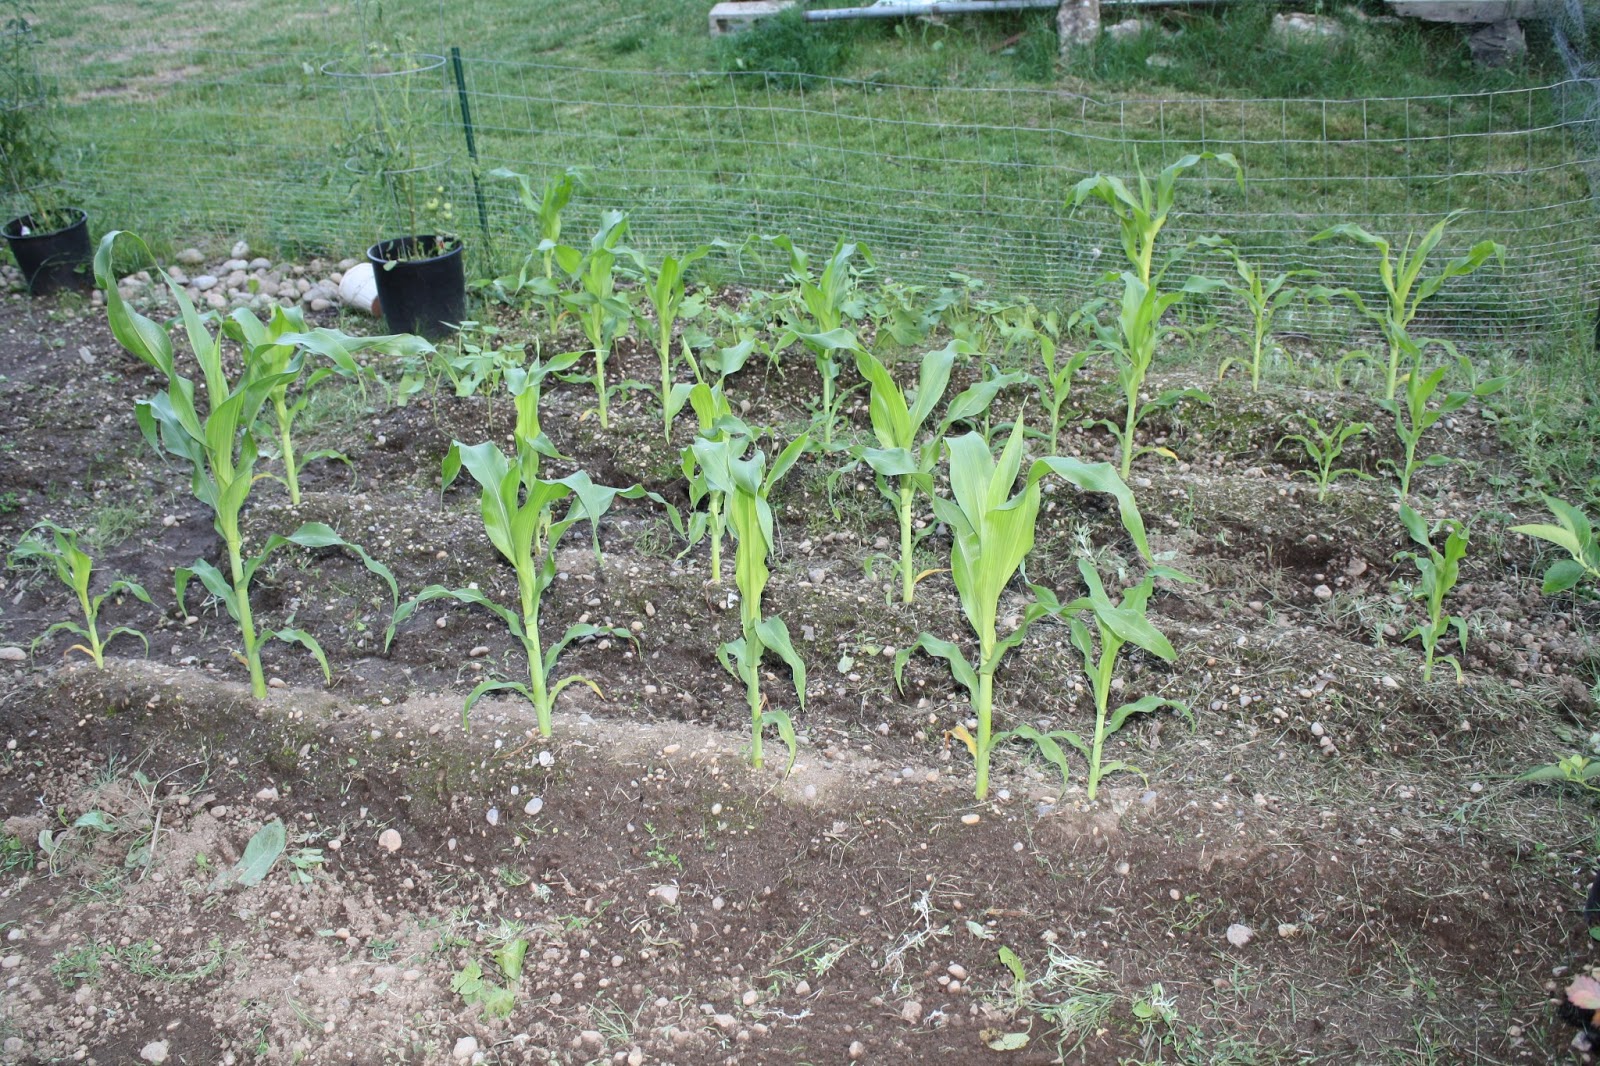
I can't believe I grew corn. I never thought I'd have the room, or that it would grow well here in the northwest. But, it did! This variety was actually supposed to be grown in containers on a deck for people with less room, so it is only supposed to grow 5-feet high and produce 2-3 ears per stalk. Some of ours have reached 6-feet, and out of the 20 that came up (from 30 seeds planted), over half of them have two ears of corn at this time! That's 26 ears of sweet delicious gold that will be eaten soon!


These are the bushel baskets of sweet potatoes. They are just now starting to yellow (as you can see on the left. Excuse the weeds, please.), so I'll be dumping them out soon to see what kind of bounty we've gotten. These will have to cure, too.


I've gotten many of my banana peppers (pickled those bad boys right away!), and Serrano chilis (can you say Fresh Salsa?!), but I'm still hoping these bell peppers will get bigger and turn the yellow and red colors I ordered. I've always wanted to grow peppers, too, and never thought they'd do well here, but they really did. And the ones in containers did better than the ones in the ground, by far! Mental note.
 
 
 These are three of my tomato plants that are full of fruit right now. I've never in my life had this many tomatoes successfully grow. Now if they'd just turn RED!
 
 
Here are all my  new areas so far... The top picture is onion starts and onion seeds - both walla walla. I've learned that if you want the really large globes like you can buy in the market, you want to plant your onions in the fall and let them "over winter." I'm excited to try it! The top picture also shows a bit of the bed where I've started collards and turnips. They are both popping up, but you can barely see it.
The second picture shows napa cabbage, traditional cabbage and broccoli starts. Next to the napa I've also planted kale, radishes and spinach! 


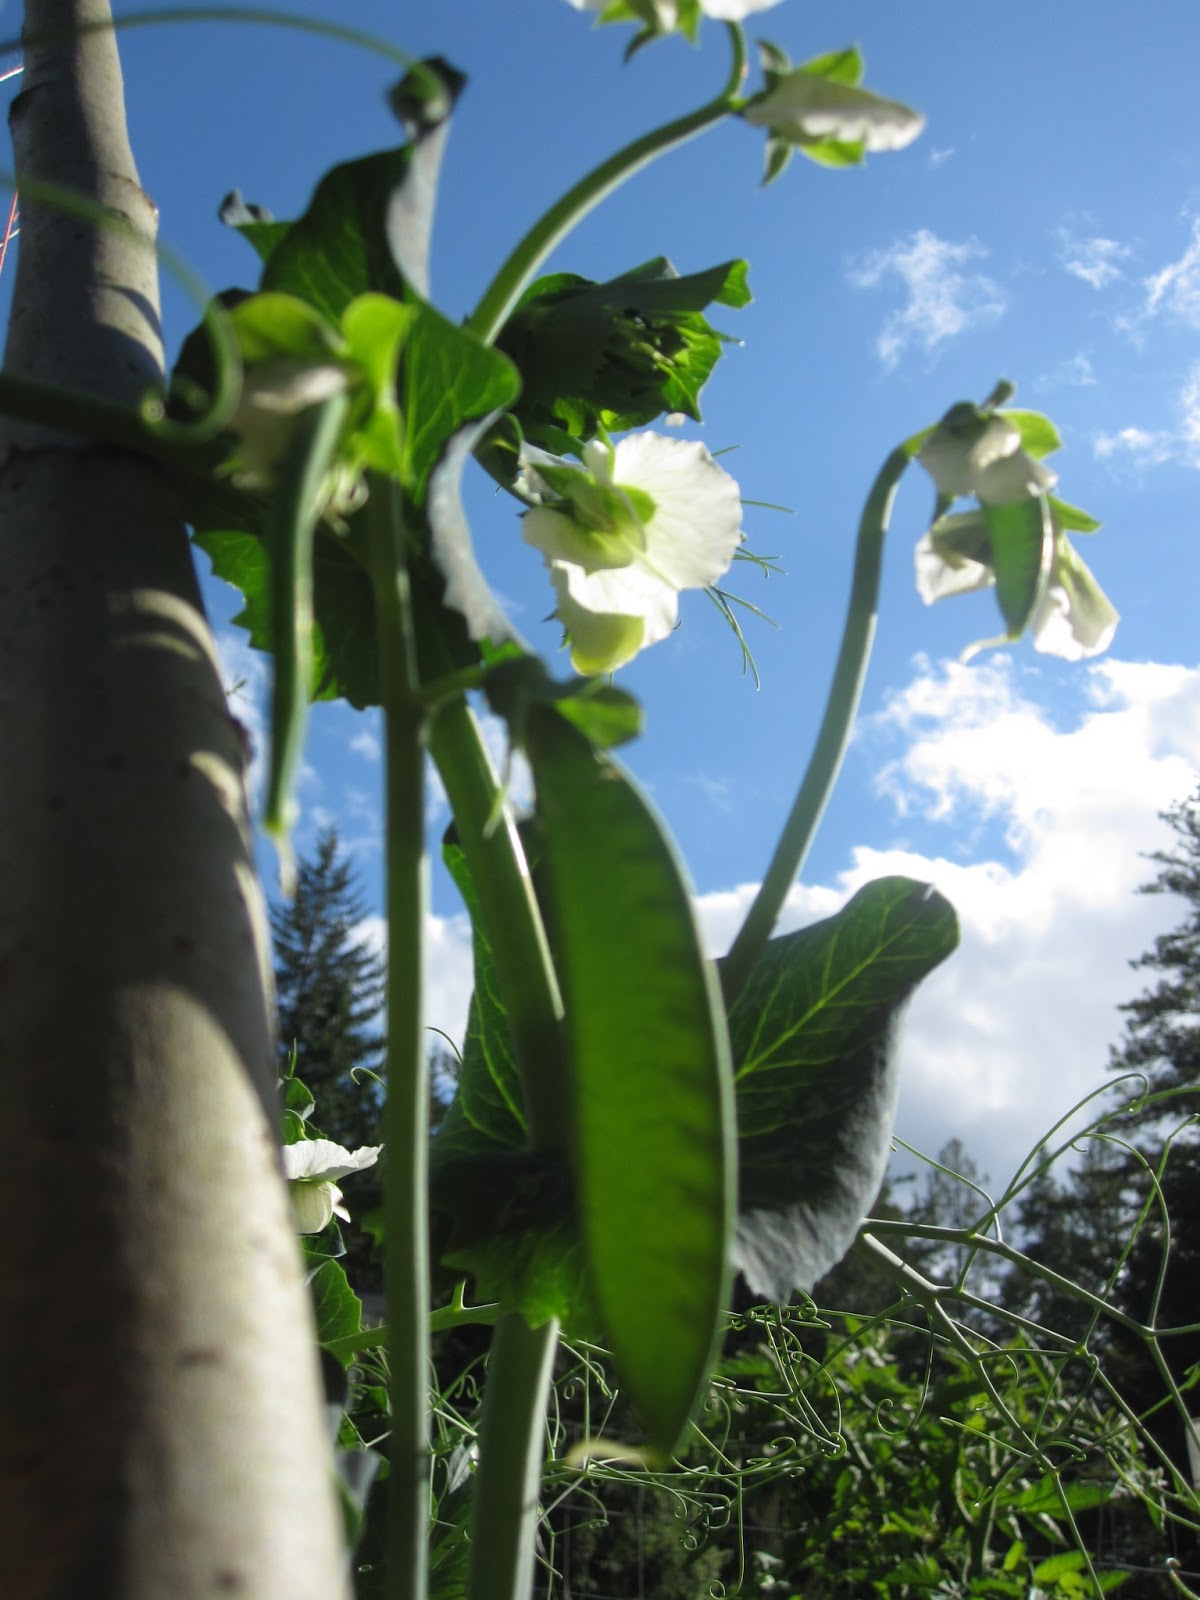
I still need to plant basil, lettuce, dill, carrots, and peas. But those will be a little later on. I've also learned that if you want really big garlic you plant it in the fall, cover the beds with straw and let it pop up with the crocus in January! So when the corn comes out this fall I'll be plowing that section under and planting garlic. About mid-October.

What a great learning experience it has been to plant a larger garden this summer! It has been satisfying to the Nth degree. And it has also led me to my new-found passion for CANNING! More on that in another blog...
 

Friday, July 19, 2013

July 4th garden update!

Garden update - Just some pics from early July...


The verdict on potato towers

Back in the Spring I wrote about the exciting idea of planting my potatoes in towers this year. Because I had read so many varying techniques online, however, I wasn't sure if I should use hay/straw, or soil, or compost; or if I should use seeds or plain ol' taters from the store; or if they should be cut up or placed in whole. SO, I ended up doing a mixture of all of these ideas to see what came out the best for me.

The results are in! And so are the potatoes. Disappointingly, only about 15-pounds worth. I planted 5-pounds or so of potatoes, so they didn't produce much. I think part of the problem with potato towers is that, while they conserve space, you limit the amount you can grow. (duh!) Mine were about 18-inches across this year, and next year I will make them at least 2-feet.

As far as planting in hay/straw versus soil versus compost, I could clearly see as we were harvesting each tower that the potatoes did not grow in the layers of hay/straw at all. They definitely grew more in the soil, but I'm sure the compost helped to feed things. Next year I will just use the hay/straw to line the wire tower and I'll fill it with soil.

I will also continue to add soil as the potatoes peep out the top. I had read about this idea, but decided not to incorporate it this year. After watching the soil and hay/straw compact down to nearly half the tower, I can see now that I wasted a lot of space by not continuing to fill the towers with soil as the potatoes grew. I wonder how much I would have grown if I would have done that.

The potatoes we harvested were all from seed potatoes. The potatoes I just threw in from the store did nothing but rot. Actually, a few produced some deformed looking lump-growths that we threw out, which is just eerie. (No, they were not organic. Mental note.)

Lastly, the seeds that seemed to produce the most growth were in fact cut up, but they were substantially large chunks, like, nearly half a potato. I gather that the smaller cuttings just didn't have enough for the plant to feed off of to form the initial growth.

So, that's that. Next year, here is the plan: wider towers lined with hay and filled with amended soil, which I will continue to fill as the plants grow. I will only plant seed potatoes, which I will plant in large chunks with good eye growth starting.

Monday, June 3, 2013

First Harvest!

I just got to take the first veggies out of my garden and I can't get over what a satisfying thrill it is!! Not only do I feel a sense of accomplishment that my hard work paid off to some degree, but I also love that it is all starting to help the pocket-book because those are less things I'll have to buy at the store this week!

I took out two small heads of broccoli because they were about to bolt, and pulled a few grape-sized radishes that went straight into my 12-year-old's belly! I have two Napa cabbage plants that are also bolting, but I've done my homework and others say the loose leaves I have that didn't form a head are just fine to eat. I see stir-fry in my future!

Here are some pics I just snapped. Excuse all the weeds (eek!), I'll be out there tomorrow laying siege to them since the weather is supposed to be near 80-degrees! Perfect weather to sit in the sun all day.

Had to include a picture of one of my rose buses that is budding out all over the place.

 
 This is that rhubarb I was fretting about several weeks ago when I put it in the ground, remember?! It has settled in and really taken off. I'm thrilled. Really looking forward to all I'll be able to make with these yummy stalks!

These are two of those celery plants I grew from the chopped off end of a celery I bought at the store!! I really thought they weren't going to last once I put them in the ground, but they are starting new growth from the middle and look great! Amazing!


My shelling peas already have pods that are several inches long! I actually didn't even know they were there until today. Pretty neat.


The sugar snap peas are now taller than the tee-pee supports we made for them!! I wish I would have chosen a different type of support. They aren't falling over (yet!), but I think they might before all is done. I don't think I'll do tee-pees again.


The potato towers are growing like crazy!!


Radishes!! I love growing radishes because they are so simple and not fussy and grow quickly - they can make anyone feel like a gardener.


My zucchini! WooHoo! (1 of 5)


Excuse the weeds about to choke out my pumpkins, but I'm still thrilled with how big they are already! These suckers grow FAST! I've planted sugar pumpkins for pies, and larger ones for carving.

 
Well, here is my tallest corn. ... Sigh. Ha-ha. I just don't know if it is good or not. Out of the 30 seeds I planted, only 20 have come up, so I'm hoping there is enough there to self-pollinate and actually get some ears of corn out of it. We'll see. This corn thing is new to me. (According to the kids I should pile up salmon guts around it like the Native Americans did... Hmmm.)


Here are the broccoli that are trying to bolt. Took a couple 3-inch heads off tonight, but the others look like they might be able to hang in there and grow more. I just planted them way too late. I'll try again in the fall so it will be nice and cool for them.


The two bright green plants on the top are the Napa cabbage that are coming down tomorrow.


Okay, these next two pictures are my "help-I-don't-know-what-I'm-doing" pictures... These are green beans, but they sure aren't very happy. Why? Do you know? I do not. Only 8 out of 30 seeds came up at all (heirloom seeds from Burpee. Hrmm..) and they are a little yellow... I'm hoping a few days of sun will improve their looks.

This is my other question... see how the onions are peeping through above the soil line?? Is that ok? Is it normal? Should I cover it with mulch or something?! It looks as though it is going to pop right out of the ground!

 
Well, that's all for now... I'll post again when something significant happens!
Thanks for walking through my garden with me again. I wish we could sit on the porch with some iced tea and enjoy the golden glow of the sunset together... I think I'll go do that for us. ;)

Monday, May 13, 2013

Just keep blending, Just keep blending... Making homemade Almond Butter!

 After seeing how expensive almond butter can be at the store, I decided to try to make my own. I was definitely set on it after I read at Detoxinista.com how EASY it is! (You can read about the nutritional benefits of almond butter in this little article here.)

I started with raw almonds from Trader Joe's. I hear you can also use roasted almonds, or roast them yourself at 350-degrees for 10 minutes. I might try this next time since I think it would begin to break them down and make the process faster.


All you have to do is put a cup or two in the food processor for a while and let it do all the work!!
**WARNING: They make a HUGE clattering noise the first few seconds of blending!!! (WOW, did it make all of us jump!!!)**

The instructions I read said they'd only need to be blended 10 minutes, but mine took 30... Perhaps because I kept stopping to take blogging pictures?


I also had to keep stopping it to knock the sides down. I started counting so I could tell you how many times I had to scrape the sides, but I stopped around 6 after 15-minutes or so... Let's just say I had to do it a lot.


After about 20 minutes it finally started sticking together...


Then clumping...


And finally blending...


After 30-minutes on-the-dot it became creamy!


I let it go another minute or two to get it nice and smooth...


It looks like there might still be lumps or bits of nut, but when you pinch it between your fingers it is smooth and pasty.


I started with 2-cups of raw nuts and ended up with about a cup of nut butter. I'll be using it in smoothies and baking. I'm particularly excited to use it in this Grain Free & Gluten Free muffin recipe!